Why size and size are two different things.

It can be very confusing.
Understanding some of the details about how photographs are stored on disk, how they are displayed, and how they are printed can allow you to make a dramatic difference in the size of documents, webpages, emails, and more.
It isn’t terribly complicated to understand, but the details can be a little confusing if you don’t know a couple of fundamentals — especially because there are two different types of “size.”
So, I’ll start with the fundamentals.
Become a Patron of Ask Leo! and go ad-free!

One measure of size is an image’s resolution, which measures pixels (or dots) horizontally and vertically; 1920 × 1200 pixels, for example. Another measure of size is the amount of space in bytes required to store the file of the image on disk. The relationship between the two is affected by both lossy and lossless compression algorithms used when saving the image. Sharing a file that is too big in terms of file size can result in long or slow page displays and downloads, or email being rejected for being too large. When you share an image that is too big in terms of resolution, it can be awkward for the recipient to view. You can make images smaller by resizing, cropping, and/or adjusting compression settings.
We’ll start by defining two terms: pixel and resolution.
Pixel
A pixel (short for “picture element”) is a dot.
Seriously, that’s all it is. One dot.
We can do things with that dot, like give it a color, and I’ll get to that in a moment, but at its most fundamental level, a pixel is nothing more than a single dot.
That was easy.
Resolution
Computer display devices, like the screen on which you’re reading this, is nothing but a rectangle of pixels. The rectangle is so many pixels wide (horizontally) and so many pixels high (vertically).
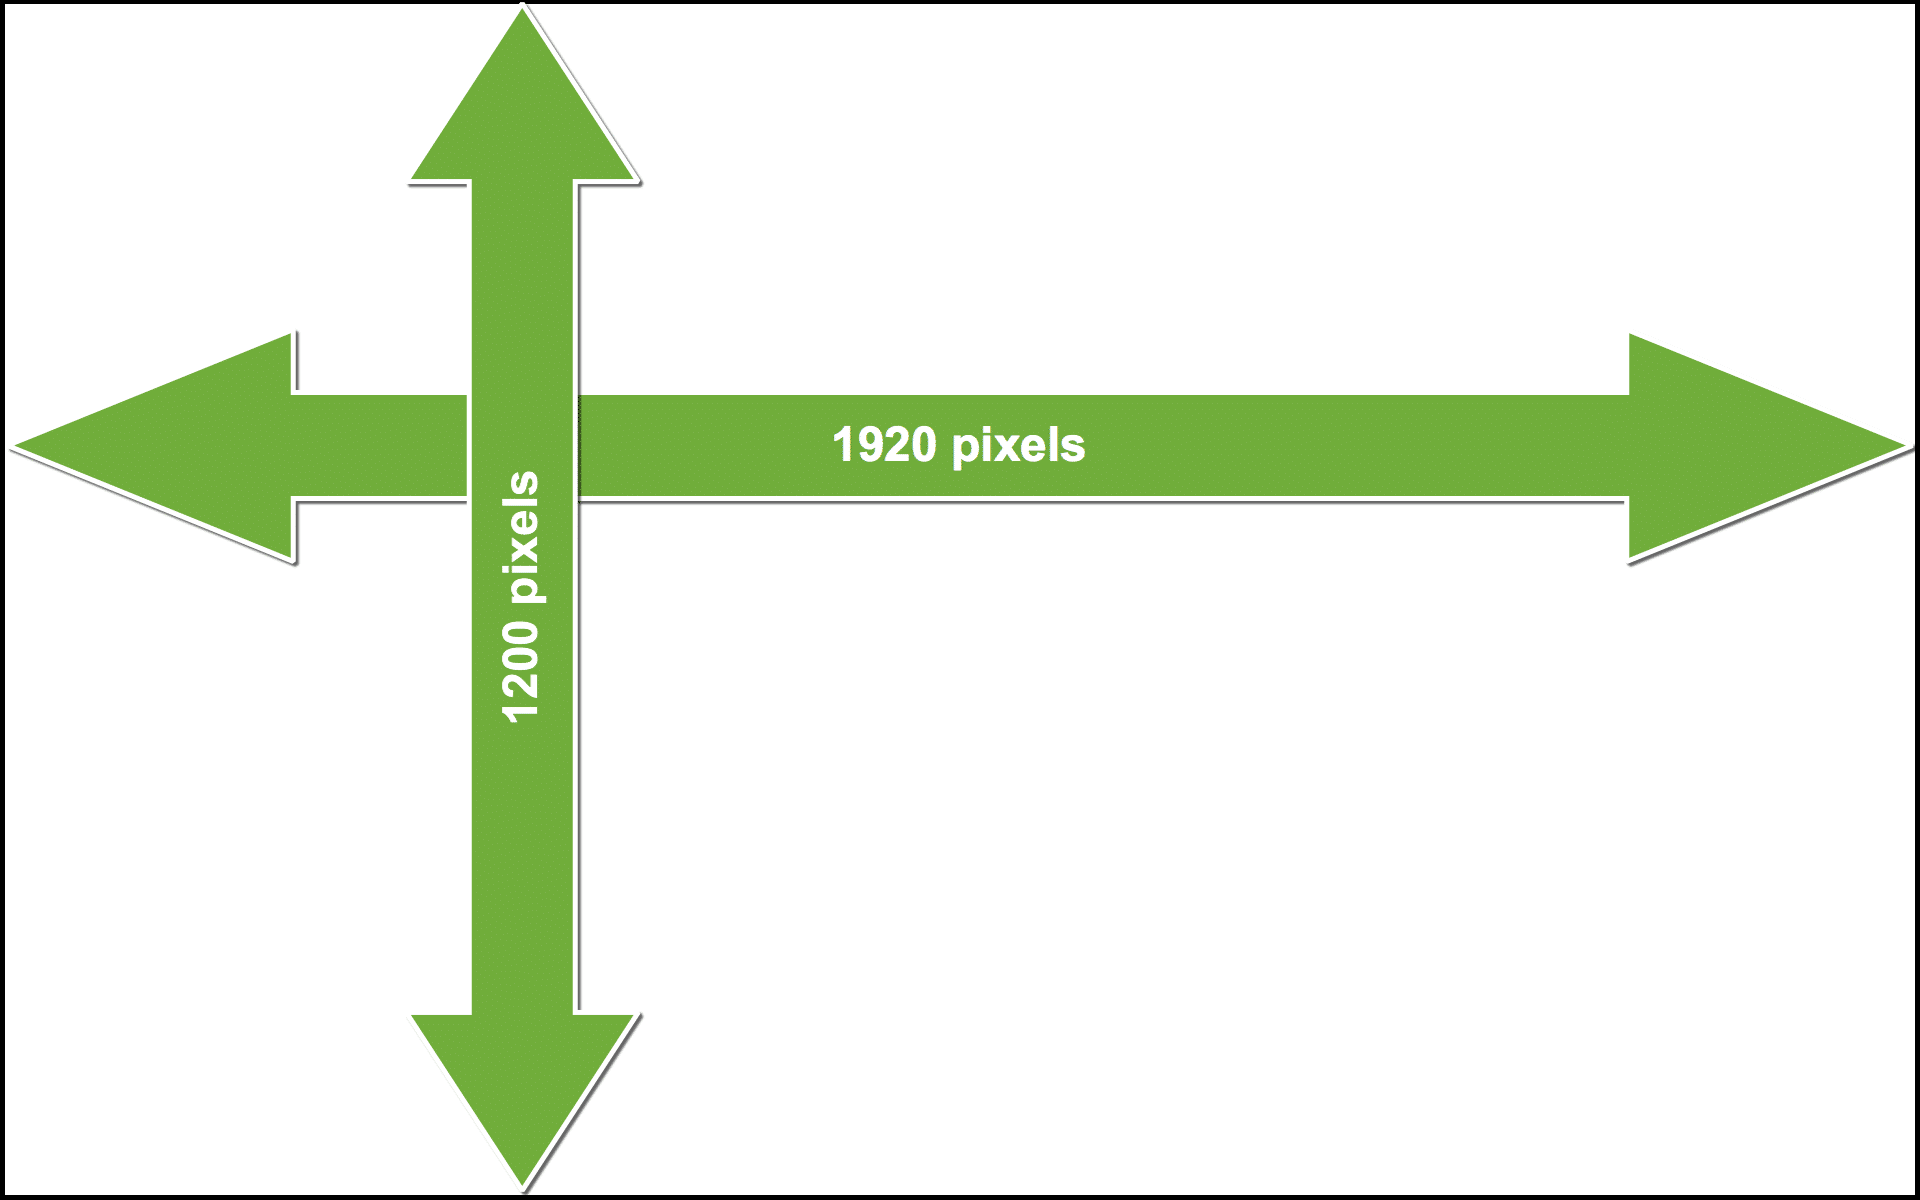
For example, one screen I use is a rectangle that is 1,920 pixels wide and 1,200 pixels high, or simply “1920 × 1200”.
That’s referred to as the resolution of the device: a measure of how many pixels the device is capable of displaying.
If you do the math, the screen has 2,304,000 pixels — a little over 2.3 million.
Camera people like to call numbers like that megapixels. The screen above would be 2.3 megapixels, but we generally don’t refer to display devices that way.
When a digital camera takes a picture, it is recording what it sees in pixels — lots and lots of pixels. My camera, for example, creates images that are 4,288 by 2,848 pixels, which works out to 12,041,344, or a little over 12 megapixels. That camera is already a few years old; newer models can take even larger pictures.
Size versus size
With pixels and resolution under our belt, we can start talking about size. Image size can be a confusing concept because there are two different kinds of size we’re talking about:
- The physical size of the image displayed on screen or printed on paper. We measure that in inches or pixels.
- The size of the file — like “.jpg” or “.png” files — in which the image is stored on disk. We measure that in bytes.
Unfortunately, the relationship between the two is tenuous at best. An image can appear quite large on screen, but due to factors such as compression, quality, and a few other things, the actual file size might be quite small.
In the other direction, a small image on a screen or in a document might in fact be a huge file.
Size matters. By understanding exactly where size comes from and how it impacts your audience, you can get the optimal balance: great-looking images that take up just as much space as they need, and no more. You can avoid delivering images of poor quality or documents of unnecessarily large file size.
So let’s look at both of those types of sizes.
Image size in bytes: the size of the file
We can’t really talk about the size of an image in bytes without first discussing how color is represented in an image.
Adding color
Each pixel can be set to a single color; that part is relatively easy.
As it turns out, all visible colors can be described as a combination of the primary colors: red, green, and blue, often called RGB. While there are several approaches, color is most often represented in three distinct numbers: a number between 0 and 255 that indicates how much of the color red should be shown, another number for green, and another number for blue. Gray might be an RGB value of 127,127,127. What I like to call “Ask Leo! blue” is 45,114,217.
What that means is that it takes at least three bytes to describe the color for each pixel.
In the 250 pixel wide × 141 pixel high image below, we have a total of 35,250 pixels; they require 105,750 bytes to represent the full possible range of color.
Compression: making files smaller
Here’s where some geeky magic happens. The file containing the image above doesn’t take up 105,750 bytes of space on your computer. The size of the file is impacted by compression, which is nothing more than complicated math used to reduce the amount of space needed.
There are two kinds of compression: lossy and lossless.
Different storage formats use different algorithms (that complicated math I mentioned) to compress images.
- Lossy Compression. The compressed image is slightly different than the original.
When dealing with photographs, the visual quality of the image can be reduced to make compression more effective (and thus the size smaller). For example, it’s unlikely that you would see the difference between grey values 234 and 235, so the compression algorithm might make the color values for neighboring pixels both the same, and thus more likely to be compressed.1 JPG format is an example of a lossy compression format. When the file is saved, the user can select the quality of the image.
- Lossless compression. The compressed image is identical to the original.
For example, an entire row of pure white pixels might be represented as something smaller than representing each individual pixel. “20 white pixels” would be smaller than “white pixel, white pixel, white pixel,….” repeated 20 times. PNG is a good example of a lossless image compression format.
In the example photo above, compression has reduced the 105,750 bytes of information it contains to 63,029 bytes of actual file size.
The number of bytes an image takes up on disk is one kind of “size”. We’re also concerned about the other kind of size: how big the image appears when viewed.
Image size in inches: the size of the image on paper or screen
The magic acronym when displaying pictures is DPI, or Dots Per Inch.
Remember, pixels are dots, so when we talk about DPI, we’re really talking about how tightly packed the pixels are when they’re displayed (or “rendered”) on an output device.2
For example, many LCD displays present around 75 pixels (or dots) per inch. It varies widely, depending on the physical size of the screen, the maximum resolution capability, and the resolution setting. The “retina” display on Apples were the first to have exceptionally high DPI: 220 pixels per inch. Printers often offer 300 pixels per inch, and professional printing may go as high as 600 or 1200 pixels per inch.
So what does all that mean?
It all boils down to the quality — the sharpness — of what you see.
Let’s use our color photo above as an example. I chose its size to display well on a computer screen – i.e., around 75 pixels per inch. If we print this page on a printer printing at 300 pixels per inch, the printer has two choices (which it makes depends on the printer, printer driver, and settings):
- Print pixel-per-pixel. The image that takes up roughly 3.3 × 1.8 inches on your 75 DPI screen would get printed at 0.8 × 0.5 inches on the 300 DPI printer. The printer packs the pixels in much tighter, so the 250 × 141 pixel image takes up less printed space. The problem, of course, is that while it’s nicely visible on the screen, it’s tiny if the page is printed.
- Print inch-per-inch. The number of pixels in the image is increased so it will fill the same amount of physical space (3.3 × 1.8 inches) when printed as it did when displayed on your screen. (This is the most common approach.)
Unfortunately, “stretching” a picture from 75 DPI — where it looks fine on the screen — to 300 DPI for the printer can make the picture look fuzzy, as the stretching algorithm has to basically “make up” the extra pixels.
The following three pictures are:
- A segment of the original photo, above, at 75 DPI, showing it at the same size on screen as before.
- The same photo stretched from 75 DPI to something that would print at the same physical size were it printed on a 300 DPI printer.
- A third image actually created at 300 DPI.


You can see that the stretched image definitely looks fuzzier.
How you want to deal with this depends on what you are doing. Do you want the image to look good on a screen, or when printed, or both? How much space do you want it to add to the size of a document or webpage?
When DPI and resolution collide
The images above were taken as a full-color photo taken on my 12-megapixel camera. If displayed at 100% resolution (meaning each pixel in the image is displayed on a single pixel on the monitor), that 4,288 by 2,848 pixel photo would require a 75 DPI monitor nearly five feet wide by a little over three feet high to display completely.
If printed at 300 DPI, the image would be well over a foot wide by 9.5 inches high. It wouldn’t even fit on a standard sheet of paper.
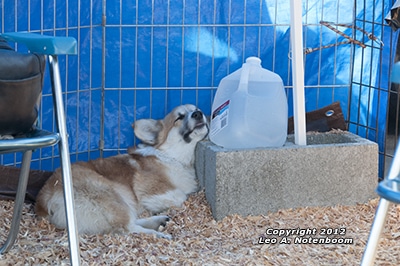
Here’s the photo again, this time at a more manageable size. It’ll download and display relatively quickly.

Click on it, however, and you’ll download the full 10-megabyte 4288 × 2848 original image. If it appears to fit on your screen, your browser has already resized it for you, even though you were forced to download the whole thing. Click on that, and it should display at its full size.
Here’s where people get into trouble. If you do nothing to modify the sizes of your images and simply place them in a document, chances are the document will be not only huge, but unnecessarily huge.
If you include full-resolution photographs in a printed document, they will most likely be automatically scaled down to be smaller when displayed or printed, depending on how you’ve laid out your document. All that extra resolution is completely wasted.
Even worse: when you do nothing to adjust the sizes of full-resolution images you place on a webpage or include as an email attachment, you’re forcing people to download the entire full-size image (like that 10-megabyte JPG above) that must then be scaled down by their browser or image viewer to something that works on a computer monitor.3
Best practices
Make your pictures smaller.
Think about how your image is going to be used, and resize the image for that target use. Make it as big as necessary for that use, but no bigger.
Is it simply going to be viewed on a screen, or will it get printed?
Understand the typical DPI that would be used for each so you can pick an appropriate size in pixels.
Want your picture to be around five inches on screen? Then around 375 pixels wide is a great start — that’s 5 inches times 75 dots per inch. Five inches on paper? Then (assuming a 300DPI printer), 5 times 300 means you probably want something around 1500 pixels wide.
There is no reason to use your full 10-megabyte, 4288 pixel-wide (or however large your camera makes pictures) image — and, in fact, every argument against doing so.
So, learn two terms — resize and crop — and how to do them. I’ll get you started below.
You’ll need a photo-editing program. There are many out there; one probably came with your camera. You can also use a freeware program called FastStone to view and edit images.
In your photo-editing program, resize and/or crop the original image to make a smaller image. Be careful to never overwrite your original: use the “Save As” command.
Best practice #1: resize
You can resize a photo to make it smaller but keep the entire image. Here’s my full photo, resized from the original monster at 4288 × 2848 down to 400 × 266 pixels.
That’s not only a good size for displaying on a screen, but it’s also significantly smaller. At 175,310 bytes, it is less than 2% of the file size of the 10-megabyte original, and downloads much faster.
Best practice #2: crop
Crop a photo to make it smaller by only including a portion of the original image. This allows you to include as much of the interesting stuff as possible, as large as possible, while still making the picture display smaller.

In this example, I’ve cropped to the same size as above: 400 × 266. In this case, the result contains only the subject’s face and nothing more, but it’s at maximum clarity.
Naturally, you can do both: crop the image to exactly what you want it to contain, and then resize the result to fit.
Save the original and experiment
As I said at the beginning, all of this can be confusing, and your head might be spinning by now. I get it.
My advice to you is to pick an image and play with it. Specifically:
- Make a copy of your original image as it came from your camera or wherever else. This is important, because no matter what you do next, you’ll always have the image back in its original, unchanged form.
- Experiment. Pick an image-editing program and try resizing, cropping, and saving in different formats.
- Keep track of your results. Resize the photo and look at the results both on screen and on disk, or even printed out. Then go back to the original, “Save As” again, and try something different. Repeat that process for resizing, cropping, and saving in different formats and with different quality levels. Each time, start over from your original so you can see what each type of operation does.
This is all really worth understanding, even at a basic level. It’ll make your documents smaller, your email more likely to be delivered, and your recipients more likely to be able to see and appreciate your masterwork.
Do this
Subscribe to Confident Computing! Less frustration and more confidence, solutions, answers, and tips in your inbox every week.
I'll see you there!
Footnotes & References
1: This is not an actual lossy compression algorithm — merely an example of the types of things that might happen when lossy compression is used in order to make the concept understandable.
2: You may also encounter it defined as pixel pitch, which is the measurement of a single pixel, typically in millimeters. My display, for example, has a pixel pitch of 0.229mm × 0.229mm — meaning that its pixels are square (not all are), and there are approximately 110 of them per inch, or a DPI of 110.
3: And, of course, not all email programs do. It’s not uncommon to receive a photo and only be able to see the upper left corner because the full photo was sent and it’s much too large for your screen.
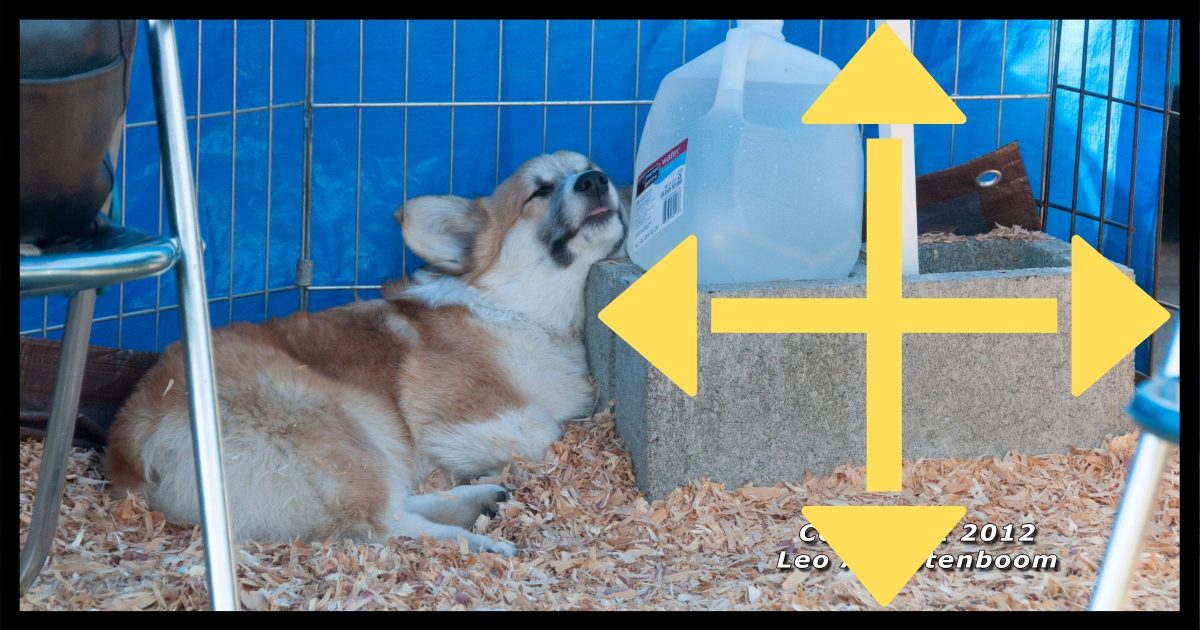
Our “model” for the example photos above: the lovely (and sleepy) Corgi “Penny”, photographed by Leo Notenboom.
Related Video


One best practice I would add:
Make a backup copy of your picture before doing any work on it. It’s too easy to accidentally overwrite your original when saving. One way to do that is: Before doing any work on the picture, perform a save as and save with a new name.
Leo, you should add a couple of additional sentences to the first section describing a pixel:
“A pixel has only one attribute, and that is its color. That is, think of a pixel as a container for a very small dot of color, or said another way, a dot who’s only thing we care about is the color it contains. The color in that dot (I mean, pixel) is the same throughout the dot’s area. There is no smaller unit of color, the pixel is as small as it gets. More about color later.”
Not quite so.
Resolution on a monitor is measured in PPI, or pixiels per inch along one side. It’s a measurement of length.
DPI is something completely different and refers to the dots produced by a printer in producing a printed image and should correctly be referred to as dots per SQUARE inch. It’s a measurement of area not length.
The two aren’t related.
26-Oct-2012
Maybe you left this out to avoid further confusion, but my understanding is that the typical inkjet printer recreates each pixel with multiple “dots”. Thus you choose the quality of the print by selecting pixels per inch (ppi) whereas the printer will probably lay down far more dots (individual “spits” of coloured ink). In printer specs, dpi is often quoted, but a 1440 dpi printer is not capable of accurately reproducing 1440 pixels per inch. Perhaps this is only important in scanning, where I have seen people say, “I have a 1440 dpi printer, so I’ll scan at that resolution.” and end up with an enormous file for no good reason, because the printer may be capable of no more than 300 ppi for practical purposes.
Come to think of it, it’s probably better that you didn’t get into that. It is complicated, isn’t it?
i have a presario SR1250NX with win 7 ultimate and a Lexmark S405 interpret printer. i scanned a picture of myself and on screen it looked fine but when i clicked “set as desktop” all you could see was my chest and belly. how did it get enlarged so much?
It’s set to be displayed at 1 original image pixel = 1 screen pixel. That’s the default for the centered mode.
You should set your wallpaper to “Stretch” or “Fit” instead of centered.
If you choose “Stretch”, the image is adjusted to fit your screen exactly both horizontaly and verticaly. This may slightly distord your image if it’s proportions, or aspect ratio, are not the same as those of your screen.
If you choose “Fit”, the image is stretched/compressed to the hight OR width of the screen while preserving it’s proportions. The display may display bands on the sides or top and bottom if the image’s proportions differ from your display.
This is great, Leo. I’ve been working with computers since the days of DOS 3.1, and this is the clearest, most succinct explanation of a confusing subject that I’ve ever read. Congratulations.
@Glen
That’s because the picture had more pixels than your screen could hold. You could either reduce the pixel resolution to the dimensions of your screen or when setting the background picture, you can choose “fit” to give it the best fit to your screen. If the the aspect ratio of your picture is different than the aspect ratio of your screen, the second method might give you blank space above and below or to the left and right of your picture.
Hi Everyone !,
As told by Leo that he have a monitor of 1920 by 1200 resolution i.e 2.1 megapixels(which is also 1080p).
I want to know that my phone is having a camera of 5 megapixels & it’s not hd. As it is greater than 1920 by 1200 megapixels so the img. from the camera will be in HD?
Like others, I’ve been working with computers and photos since the 80’s but have never really grasped the relationship between resolution & DPI etc – so thanks a million for the clearest explanation I’ve ready yet! As good as your other explanations :)
Good On Ya again, Leo!
Just a little bit on a sidetrack—
I’ve had a bunch of cameras from the 40’s onward in all price levels. Something I’ve found important to the end is the lens quality. A 10 megapixel bargain camera made crappier images than my old 3.3 Canon.
Does the old saying “Garbage in, garbage out” apply?
I’ve noticed when I download a picture it seems humongous while it’s downloading but resizes after it’s finished. Now I know why.
Another great article from the maestro of computers .Always so well presented , and understandable we are so fortunate to have such a person with this sort of talent I always look forward to Leos articles .My Regards …Skydive
Don’t forget about the open source program “GIMP” – it takes a little effort to master but has all the features of Photoshop but for free.
It has an excellent cropping feature and can automatically enhance color resolution.
Thanks Leo for the excellent article… regards… w
photofiltre is one of the best, if not the best free image programmes. There is a paying version with more features
As my free image editing replacement for PhotoShop I’ve been using Paint.net for quite a few years now. It’s a kind of mega-enhancement of Windows Paint and seems to me to be extremely versatile. But I’m no expert and I’d be interested to see comparisons between Paint.net and some of the other free software that’s been mentioned, such as Gimp, PhotoFiltre, etc. Maybe I’m missing out on good things.
Really like this article.
While everyone is recommending things, I’d like to put in a word for the “FastStone” editor you mention. If you have lots of photos to sort out and arrange or annotate for a report, it is brilliant and very simple to use. It is also very good at remembering what you were doing, and telling you what it’s doing. It is almost idiot proof. The ONLY warning is – make sure you have stored your originals first, because unlike some other programs, once you have committed to changes, you can’t automatically go back. Well worth its politely requested donation!
Leo,
Thanks for the explanation!
One typo that should probably be cleared up, though …
In the line that says “In the 250 pixel wide by 141 pixel high image below, we have a total of 32,250 pixels that requires 105,750 bytes.”
the number 32,250 should actually be 35,250 , just for those who have been following along with an abacus in hand ….
Leo’s given a great explanation. The original poster’s problem is that colleagues don’t understand this and include photos which are just way too big.
I blame that on high-speed internet. By the time photo sharing came a long, a lot of people already had high-speed internet. So few people realized how big their photos were (or if they did, they didn’t realize what the effect was).
I on the other hand only recently made the switch to high-speed. I often deleted emails with attached photos directly from the server without looking at the photos, simply because it would take too long to download on dial-up. My wife had a friend who would send a photo newsletter of her family’s activities. The newsletter would often be 8 or 9 mb and the mailbox limit was 10 mb.
I, on the other hand, would use Paint Shop Pro and reduce the file size, by simply resizing to 4.5″ x 6″ x 72 pixels per inch. A 541 kb picture would shrink to 35 kb (of course I kept the original exactly as the camera output it, in case we wanted to print a copy).
My wife’s parents enjoyed seeing the pictures of our children (their grandchildren), because on screen a 72 PPI 4 x 6 picture looks as good as the original, and I could upload them on dial-up fairly quickly.
Many people who have only sent pictures over high-speed internet don’t understand this.
The answer is not to take such huge pics to start with unless you intend to make large hi quality prints from them. 1 or 2 mp is more than enough for most purposes. So just because your camera can take 12mp doesn’t mean that you have to tale 12mp pics!
26-Oct-2012
Correct me if I am wrong but aren’t the primary colors red, yellow, blue?
26-Oct-2012
Or a t.v. screen (pre-digital – I don’t know about the modern ones).
…And furthermore, the primary colors differ depending on whether you are viewing video pixels (i.e., pixels on a self-luminous video screen), or printed pixels (i.e., pixels on ordinary, non-glowing paper).
In other words the primary colors of light are quite different from the primary colors of ink.
Sorry to make an already confusing subject even more difficult! :(
Regarding the primary colors, I was thinking the same thing about RGB being incorrect. We learn pigment primary colors when we are kids which are RYB – no other pigment can make those colors, but combined they make the secondary colors. But then learning old school photo printing, the primaries of light are CMY used in the same way as above. It is confusing and working from computer screen to printer we have to think about both. And then cmy(k) are the primary colors used for printing press work.
I choose to use PPI for anything on computer and DPI for anything printed since the “D” in DPI references an ink dot. I appreciate though that you said a pixel is a dot. That’s a very practical way to view it.
Anyway, this was an AWESOME article to sum the whole photo thing up! Gonna send my web publishing students to this page. Thank you Leo!
Regarding file size and quality, I tend to go along with graham lundebgaard (Oct. 25). Having also previously believed that blowing up pictures is not to be had, I now know better. IrfanView, amongst others, offers this facility, with a choice of algorithms. Using the max. 5MB my compact provides me with, there is absolutely no trouble multiplying the size of a photo AND assigning the desirable DPI to it for printing.
Ken Rockwell writes at length about the Megapixel Myth on his very enlightening site.
I also agree with the point made in another comment: Optics, not pixel count is decisive for picture quality.
Disagree. BOTH optics and pixel count (up to a point) are important. Good glass gives you a sharper image (no pun or plug intended). No amount of processing will restore a soft original image. But if you intend to make a really large hard print AND have cropped the original, you need a significant number of pixels. I agree the pixel race is highly overrated and the difference between 16 and 18 mp is insignificant. While I can get about a max 8 x 10 print from my (now former) 4mp compact camera, the 18 mp DSLR camera (with better glass) gets me sharp prints to 16 x 20 and more. If you are absolutely sure you will never have to make prints, get the best glass you can afford for a lower price range/mp camera. But if you think you would like to see blowups on your wall or as gifts, my take is that you want to have both elements at their best.
There was another post in this thread that suggested you should adjust your camera to a lower resolution if you’re only keeping the images in digital, not print, form. Leo disagreed and I wanted to second his motion. As he smartly pointed out, images can always be dumbed down (res lowered) but not from a practical standpoint up. With memory cards so cheap and of high capacity, why compromise. I can think of only one of two situations where you might wish to cram hundreds of pix on a card. For example, taking photos of everything you own for insurance purposes where the only thing you might do is look at them on a screen. But for virtually all other endeavors, size matters.
Allow me to agree with graham lundebgaard. If you really want to fill your 1 TB drive with useless stuff, there’s no better way that with images of multiple megabytes in size that you’re never going to look at again.
Unless you’re a professional photographer, an image of 3 or so megapixels, stored as jpg, taking up ½ MB or less is as much as your photographic skills is likely to justify.
A very informative and interesting discussion that Leo presented.
Thank you Leo.
But let me ask one question.
Many of us have full HD Monitors or Large TVs. A full HD display will occupy 1920×1080 = 2073600 pixels.
In order to transmit and receive a full HD size images on a TV(Video live chatting), without any de-synchronization of the lip movements while talking, what bandwidth, in terms of Mbs/second will be necessary ?
I mean without any compression techniques used.
I actually don’t know, for two reasons: it depends on the quality of the audio (high quality? Low? mono? Stereo? Dolby 5.1 surround?), and there is always compression.
Uncompressed 24bit 1080p 60fps television pictures require 3 Gbit/s bandwidth (actually 2.98). Known in Broadcast as 3G-SDI.
When it gets transmitted it will be greatly compressed to maximise the number of channels per transponder.
https://en.wikipedia.org/wiki/Uncompressed_video
A few random notes on the subject:
1. I have some very nice 8×10’s from pictures taken with an early 2 megapixel Canon. If I were to send them in to an online printing service today, they would tell me they weren’t of sufficient resolution to print at that size.
2. It is more common for me to deal with upsizing. I sometimes collect photos from others who have been on a group tour and then prepare a slide show. Often the pictures are taken with a smart phone and people send files that are way too small to be of practical use. If the image files are just a little too small I can resize successfully using either Photoshop or Genuine Fractals (now Perfect Resize), but not knowing the different smart phone characteristics, I don’t really know how to explain to others how to send me the appropriate sizes.
3. I could also use a good explanation of exactly what amount of up-sizing can be accomplished with good results(I understand that depends on the ultimate use), and whether there are special techniques for doing so.
There are programs such as the free SmillaEnlarger, which purport to enlarge photos and fill in the information to get rid of pixilation. I’m a bit skeptical, but since people use them, it’s possible, they do a bit better job at estimating than simply enlarging the photo in a photo editor. Perhaps someone with experience using that or a similar program can post their experience in a comment and even link to or embed a comment here. Or in your case, John, you might want to try Smilla out and see if it does what you need and let us all know.
Whenever I receive a PDF that’s way too large because of embedded photos, I use File … Save As Other … Reduced Size PDF in Acrobat Pro to quickly and efficiently cut it down to about 150 dpi (adequate for normal viewing and printing), assuming the PDF security allows editing. Of course not everyone has Acrobat Pro; it’s best to use reasonably sized photos for the intended print size before creating the PDF.
So glad you covered the correct measure of resolution, which is not DPI or PPI but the actual number of pixels in the image. Until you go to print the image at a specific size the only thing that matters is the actual resolution, measured in pixels. (And of course, contrary to popular belief print resolution is not *always* 300 PPI, it depends on the device being printed to.)
But you hit upon one of my biggest pet peeves as a design / prepress professional: the correct unit of measurement for print resolution is pixels per inch, or PPI. Digital images contain pixels, not dots. There is a difference, and if you look at the Image Size dialog in Photoshop you will see that this measurement is correctly shown as PPI.
Measuring the output resolution of a printer or platesetter would be an appropriate use of DPI, since printers place dots on paper.
Hello
I have a screen shot of a film ( snap shot from the player ) 1920×1080 and 3mb in size 72dpi. It’s a night scene and we can see the noises of the camera all around.
Is it possible to make a poster from it in size of 70m x 100m (meters) and print without losing quality ?
PS: I had to repaint the picture and give it some filters and rebuild the scene some how in photo shop to get 300dpi .
Yes and no. You will still get 72dpi – except it’ll be spread over the full 100 meters. From a distance it’ll look fine. Close up it’ll look like dots.
I have some great shots of the Oct. lunar eclipse taken with A 300mm lens mounted on an Olympus 4/3rd format camera. Images file size averages 1.5 to 2 mbytes. How large could I go on a 300 dpi colour printer until blur starts.. I am sure at least 11 by 17 but I would like to go for a banner size . Say 36 by 60 ???
hi leo
I’m trying to submit a digital pic of a painting I did. my pic is 1024pixels in height and 768pixels in width at 200 ppi…..when I change the ppi to 72, and then preview it it looks squished?…how do I adjust my images to comply with the below instructions? some of my pics are portraits and others landscapes…help leo
Digital Images: Must be RGB in JPG format with a maximum width of 1024 pixels and a maximum height of 768 pixels at 72 dpi. NO EXCEPTIONS. Digital images will be projected for the judges using an HD projector on a 6′ x 4′ screen.
The requirement is 1024 pixels wide and 768 pixels high. Your dimensions are reversed, so you would have to resize it so your maximum height is 768 pixels. The corresponding width should be about 576 pixels in order to maintain the original proportions.
Hi
I’ve just come across this interesting article but am still confused. I’ve found that my photo editing program says that images from two different cameras will
print at different sizes even though the image pixel count is approximately the same – 3648×2432. Looking at the EXIF data I’ve found that the one that would print the largest has an x and y resoluton of 96dpi and the other smaller print has a resolution of 128dpi.(The EXIF tags are 011a and 011b).
I find this confusing as I thought the print size for same pixel count would be the same.
Hope you can shed light on this.
A comment regarding colour represenation. I understand that the primary colours for light mixing are usually RGB (additive mixing) but those for pigments are the subtractive ones, the red and blue being different colours to the additive ones.
Thanks
Brian
I have uploaded a pic of resolution 800 x 1100 pixels and file size of 160 KB on my website.But when i downloaded the image its size became 230 KB irrespective of any browser i download it on.Can you please tell me why it happened?
Helo sir….Here I have a doubt..whenever an image cropped by leaving a little bit,it is increasing its size ..i mean it acquiring much data when compared to the original image…how is it happening?.its mainly happening in samsung and moto that i have observed..whats the reason..?
Perhaps you crop the image, and then save it at a bigger size or higher resolution. For instance, you could crop a 100×100 image so that it is 100×50 – and then resize it so that it is 200×100. Or you could take a .png image, crop it, and then save it as a high resolution jpg. Either of those steps would result in a bigger file.
Typically that’s a side effect of re-compressing already compressed data. That re-compression is necessary, but because the data it’s compressing is noisy (added by the original compression) it’s less efficient.
For me, perhaps the best tool for re-scaling pictures is the “Resize/Resample” function of Irfanview. ☺
Hi Leo, this may seem like a dumb question but I wanna be sure. Changing the display resolution doesn’t alter your video and image files in any way, right? It’s all about what is shown on screen?
That is correct.
Thanks Leo. So just to be clear, if my screen resolution is 1600×900 for example, and I have a video that’s 1920×1080, setting the screen resolution to 1920×1080 adds in all the pixels that the video intended to show, because the video and screen resolution match?
“Adds in” is a difficult term. If your screen is set to 1600×900 the video is down-sampled to fit, the result being slightly less crisp. If your screen is set to 1920×1080 and the video is 1920×1080 and played full-screen, then what’s on the screen matches what’s in the video pixel-for-pixel.
Thank you so much for your answers. Very last thing to be completely sure, I know you said that changing the resolution doesn’t alter my files, so bottom line, if I have a video file at the highest resolution, then lower the display resolution, and then back to the highest resolution, there will be absolutely no change in pixels from how it was before right?
The video file will not change, so yes, barring any other changes (courtesy of the video driver, perhaps) it’ll be identical.
Thank you Leo. If I may ask, what other changes are you referring to?
Nothing specific — it’s just that video drivers can be weird at times, and make other unanticipated changes (like color depth, etc.).
Oh, I see. But even with unexpected changes, they remain as part of the display—not touching the file, right? (Sorry to drag this out, this is my last concern for sure. Thank you Leo.)
Correct.
Tom, if you’re worried about your “settings” changing (perhaps “ruining” would be a better word in this context) your video/picture file, there is a very simple solution — and one, might I add, that Leo suggests all the time: backup.
Copy that file to another location, save the original file in a safe place, and work only and exclusively with the copy.
Then, it won’t matter if, or how badly, your tweaks munge the file — because it’s just the copy, and not the original.
Hope this helps! :)
Enfocus Pitstop Preflighting is showing indexed color space and size (pixels) 2839X3925 and Resolution (ppi) of 16.37.6X16.36.3.
As we have received query from my printer on many pages. “Resolution of color and grayscale images is greater than 600 DPI.”
My question is, It will create problem in printing a book? or we have to resolve it immediately.
Thanks
Prakash
I honestly don’t know. I’d contact the printer or printing service for advice.
As for resizing and/or editing pictures, folks, I will say just one word: Irfanview. :)
I use Irfanview for my default file viewer. In addition to resizing, I use it for cropping and other tasks. Leo prefers FastStone Viewer. For more advanced editing, I use Gimp and am experimenting with Paint.net.
OF late I’ve been installing XnViewMP, which is multi-platform (Win, Mac, Linux). A little more obtuse to use, but quite functional.
In addition to Fastone, another good picture viewer/editor is IrfanView:
https://www.irfanview.com
…Hope this helps! :)
Irfanview is one program I use every day and often several times a day. Recently, it has added a lot more editing features.
When I got a computer, about 18 yrs ago, I did not know how to resize old family photos I got on emails etc. that arrived either Very Large or very small. As a result, the ones I sized down I sized down too small and the small ones that I resized up where blurry and pixelated! Plus I hadn’t save the original so that was that. Thanks for explaining all this to me so I can understand the whole process.
Does anyone have a recommendation for an app that will resize (reduce) photos on a Samsung phone?
As I build my first Win10 machine and learn the Thunderbird email client this article has been valuable in regards to resizing objects to insert in emails. Apparently Windows Live Mail, which we still use on our Win7 machines, integrated ‘better’, since I never had problems with inserted objects (photos, illustrations, other graphical constructs regardless of file type) being too large or small in the source email or on the receiving end (Windows, Macs, Linux, Androids, iDevices). I’ll definitely give FastStone a test drive; from the video of this article it appears to be quick & easy compared to PhotoShop for simple tasks like resizing and cropping … and I like the pre- and post- data provided in the window further speeding up the process. Last … Freeware and Leo uses it … two checks in the favorable column.
Size limitations are a result of the limitations of the sending and/or receiving email servers. It’s not a limit of Thunderbird or the email program you use.
Two tips:
1) IrfanView is an excellent piece of freeware. Not only as a viewer, but also for simple edit functions (resize, cropping, etc).
2) Don’t edit a jpg, save it as jpg en keep on doing that. It is “compression over compression”. (Keep the original, like mentioned earlier.) Work on a lossless format and only convert the final result to jpg.
I used to use .jpg format, but I’ve switched to .png a few years ago. The files aren’t huge relative to the size of our current drives and it’s lossless.
And I use Irfanview every day. It gradually added more editing capabilities.
I have a 10.1 MP point and shoot camera that takes great photos. It also is fixed at 72 DPI, that I can not change. I am really restricted on most POD sites for print sizes, and products I can print on, but have no problem printing my images on Vista Print T-shirts, and some of their other products, of larger sizes, like car magnets 28×30, and they come out just fine. I just do not get it!
I friend suggested I get Topaz Gigapixel AI program for resizing. But I heard some POD sites do not except resized images. I do not know if that is true, or not, but I get told I can not print on most of their products as my camera stands right now. I just do not get it. I just want to be able to print on sizes from 8×10, up to 36X”” without spending money on a digital DSL for hundreds of dollars. I wish the photographic industry of POD’s would all get on the same page, and solve these issues.
Art Dean
Hey Leo, thank you for explaining. I need to get my images to 300 DPI resolution so that they may print nicely in my book, but I’m having a hard time understanding if the images are at 300 DPI yet or not. Regardless, thank you for explaining in simple english.
P.S- Neat that you were an engineer for Microsoft. My former step-dad, Mark L. from Vancouver was also working in Software for Microsoft at the time.
Right-click on the photo
Scroll down to the bottom of the pull-down menu.
Click “Properties”
Click the “Details” tab
The resolution will appear in that list.
Hello, I was reading your article and had a question. Sorry I am new to dpi and scanning. When I scan a document to PDF, I am given dpi options (200 dpi, 300 dpi, 600 dpi, 1200 dpi). My question is – does this selection of dpi impact the file size of the PDF? So, If I select 1200 dpi, will the PDF file be larger than if I select 200 dpi? Thanks for any clarification
The higher DPI produces a larger file.